CURIUM PORCELAIN CRAFT !
- Didier Fallières
- Sep 21, 2023
- 4 min read
Updated: Oct 10, 2024
It is important to correct an inaccuracy in the Kintsugi story recently read on the internet. The story of the Celadon porcelain bowl called Bakōhan is often presented as a mistake made by Chinese craftsmen who repaired this bowl with staples.

A Whole different story
The Bakōhan porcelain bowl is particularly appreciated in Japan because of its shape and the work of its glaze, but also for its history. The Japanese call it the "large grasshopper pincer", a name given by Ito Tōgai, a Confucian scholar of the Edo period. One of the first appearances of this type of bowl in history dates back to around the year 1175, when a Zen priest Busshō offered it as a gift to Taira no Shigemori (eldest son of the head of the Taira clan, Taira no Kiyomori), in exchange for his gold donation at Mount Yuwang in Hangzhou, (Zhejiang province, China at Angen 1).
Later, during the Muromachi era, it came into the possession of shogun Ashikaga Yoshimasa (ruled 1449 to 1473). During its use by Yoshimasa, the bowl cracked, so he sent it to China to exchange it with another bowl of the same quality. The crack was simply secured with staples. The bowl became even more popular and the use of this large clip having the appearance of a large grasshopper gave this bowl its name, Bakōhan (large grasshopper claw). This particular method of repairing porcelain was widespread in China, called the art of curium porcelain.
(source: Tokyo National Museum).
Curium Porcelain
An old Chinese saying goes: "Don't work porcelain without diamonds", referring to an ancient folk craft, "curium porcelain". It is one of the oldest porcelain repair techniques in China (intangible cultural heritage of Hebei Province, "curium engraved porcelain technology").
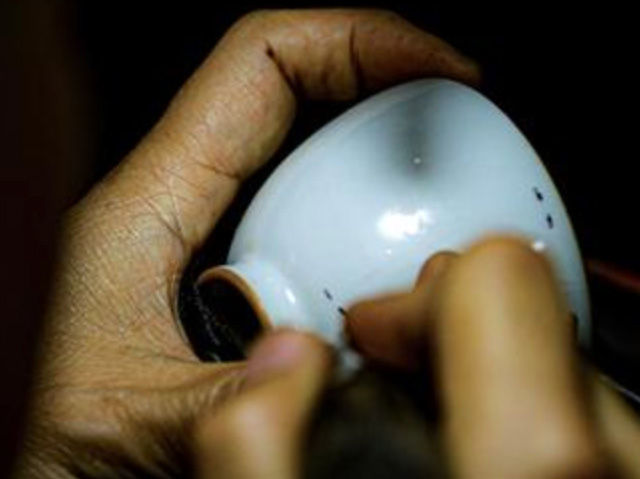
Artisans of this technique use diamonds as drill bits to drill tiny little holes, then insert "curium" staples to tighten the cracks and repair the damaged porcelain to make it watertight.

The craftsman first uses a string to fix the fragments, then presses the drill tube against the drill hole on both sides of the joint, pulls the small arc back and forth to drill tiny holes of a few millimeters, then inserts the staple into the hole, hammers it gently and finishes by applying a coating made of glutinous rice paste and bone glue.
Since the nails are embedded in the outer wall and do not penetrate the inner wall, there are no nail marks in the bowl, so liquid does not leak.

As with Kintsugi, it is difficult to date the appearance of Curium Porcelain in China. Curium Porcelain craftsmanship is believed to have begun in the Song Dynasty (960 and 1279). The oldest archive dates back to a work scene of a Curium Porcelain craftsman from this period. In the photo, the craftsman uses a toolbox and a small oven to soften the metal.
During this period, curium artisans circulated through the streets of villages carrying their materials, shaking their rattles and shouting “锔 Curium, 锔 Curium” to encourage repairs. The residents then took out their broken porcelain and handed it over to the craftsmen. Once the porcelain was repaired, water was poured in to prove that the repair was done correctly.
This traditional method of repair was also used in Japan by artisans from China during the Edo period and early Meiji period and was known as Kasugaitsugi.
Until recently, we could see Curium artisans perpetuating curium porcelain in certain regions of China.
As with Kintsugi, Curium porcelain gradually disappeared with the development of industrialization and the logic of disposable objects: "If the porcelain is broken, throw it away and buy a new one".
Fortunately, in recent years, China and Japan have seen a new generation of young artisans and artists rehabilitating this knowledge.
Curium Porcelain main steps
Commonly used tools for porcelain curium are: drills, curium pliers, tweezers, gold hooks, iron, brass, small hook hammers.
For the curium repair line, the most basic requirement is that the curium has no leakage.
The steps for mounting curium porcelain are divided into five steps:

The first step is to weigh down with a string all the broken parts of the porcelain, the joint, the broken porcelain to restore the original state, ready to be repaired.

The second step is to locate the drilling point, depending on the structure of the decoration as well as the style and position. This will define the number and location of the curium nails.

The third step is to punch holes using a diamond drill, the difficulty here, is to not completely drill the porcelain, generally 1 to 2 mm depending on the thickness.

The fourth step, laying curium nails, reflects the level of craftsmen, the toughness of curium nails and the production level of curium nails also determines the lifespan of curium repair containers.

The fifth step is to use a mix of egg white and porcelain powder mixture to prevent leakage of the porcelain once completed.
Contemporary Curium Porcelain
This craftmanship has managed to persist until today, only the utensils have been modernized with the use of electric drills such as various pliers, small hammers, staples of all kinds (different shapes: classic, flowers, animals, etc.), but the knowledge remains the same. Some artists also incorporate materials such as glass and crystal.


Comments